Guide: How To Repair A Tubeless Tyre Puncture

Updated on: 20th December, 2023 IST
Almost all modern day cars now come fitted with tubeless tyres. As the name suggests, these tyres do not have an inner tube and are mounted on the rim or alloy wheel of the car directly. These are as safe and reliable as a tube type tyre but have a major advantage in the form of air not leaking out immediately in the event of a puncture. But what will you do if you encounter a tubeless tyre puncture? Repairing a tubeless tyre is a quicker process and can be done by the owner himself. Don’t believe us? Well, read on to know how you can repair a tubeless tyre puncture yourself at home.

Table of Contents
1. Get the Tubeless Tyre Puncture Repair Kit
A tubeless tyre puncture repair kit is easily available at any car accessory and tyre shop. You can even order one online. Also, invest into a portal car tyre inflator. You will need to purchase a set of pliers from a hardware store as well. All this can easily be kept in the boot of the car
2. Locate A Safe Spot
If you get a puncture on the move, try to park the car at a safe spot. Make sure it’s a well-lit area and you are not obstructing the traffic flow. A front tyre is easy to repair than a rear one. This is because you don’t have to take out the front wheels – simply locate the nail (or some other sharp object) and turn the wheel outside or inside depending on the location of the nail. You may have to move the car slightly to get a good view of the nail. For rear puncture, you will have to put the car on a jack and take out the wheel. For this, refer to our guide on “
how to change a car tyre”.
3. Use The Tubeless Tyre Puncture Repair Kit
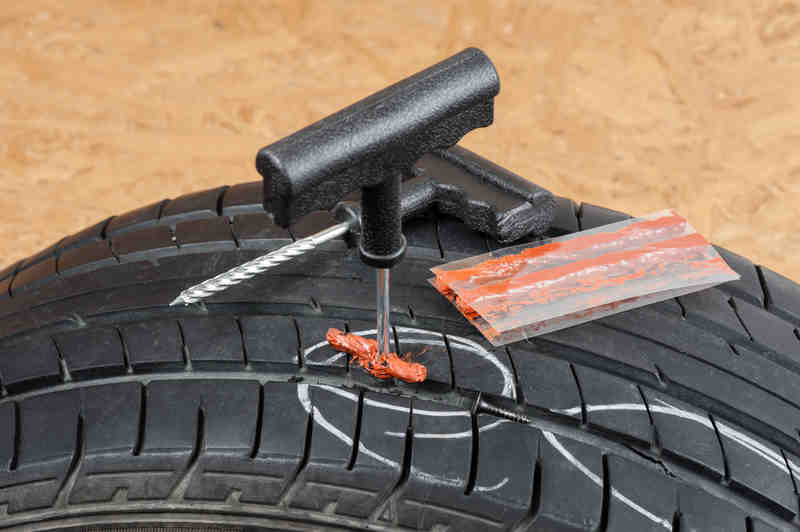
- The kit usage remains same for both front and rear tyres. You can use the “smoothening tool” and pliers set together to pull out the nail from the tyre. Be careful to dispose of the nail safely.
- Next, you will need to use the “smoothening tool” to smoothen out the small hole made by the nail. You will need to insert and extract the tool multiple times so that the hole becomes big enough to accommodate the rubber strip that is used to clog the hole.
- Once you feel the hole is big enough, prepare to insert the rubber strip. Remember, do not extract the “smoothening tool” out, but leave it midway in the hole. Now use one complete strip and insert it into the “Strip insertion tool”. If you have taken out the tyre, hold it between your legs tightly. As you remove the “smoothening tool”, insert the “strip tool” side by side and push it in all the way. Wait for a second and pull it out completely.
4. The Final Steps
The rubber strip will stay back in the hole, blocking it properly, thus avoiding any leakage of air. You can use a small blade to cut off the left outstrip protruding out of the tyre hole.
Do not use a puncture kit which is older than two years. In such cases, the rubber becomes very hard and it will be next to impossible to insert the rubber strip into the hole.
5. Quick Check-Up
Use water to check if there is any air leakage from the plugged hole. A portable tyre inflator will also come handy to refill any lost air.
Time taken: You can easily repair a front tyre in about fifteen minutes including filling back any cost air. If it’s the rear one, add in another fifteen minutes to remove and fit the wheel back. Damage on the pocket: A puncture repair kit, portable tyre inflator and a set of pliers will not cost over Rs 1500 – 2000 depending on the model. This is a safe investment that can come handy during road trips as well.
Liked the post? Do share your feedback in the comments section below. Planning to sell your old car? Know your car's value using our
online car valuation tool and sell it to us at the best market price.Recently Added Cars to Buy
Other Blogs
- Recent
- Featured
Popular Cities to Sell Car


